comp7300
Implementing financial system with Web technologies
This lab tutorial aims to show how to implement a financial system using Web technologies. The system will be composed of a Web server and a Web client. The Web server will be implemented using the Python programming language and the Flask framework. The Web client is a single page web application which will be implemented using HTML, CSS and JavaScript. The system will be composed of the following components:
- A Web server which will be responsible for managing the accounts of the users and the transactions between them.
- A Web client which will be used by the users to interact with the system.
- A database which will be used to store the accounts and the transactions.
Software requirements
Before starting the lab, you need to install the following software:
- VS Code: Our favorite code editor for writing code
- Firefox or Safari: A modern web browser for running the Web client
- Python 3.8 or higher
- Flask: A Python framework for building Web applications
- Flask-Dance: a Python library for implementing OAuth authentication with Flask
- Flask-SQLAlchemy: a Python library for connecting Flask to a database
- pyngrok: a Python library for exposing a local Flask server to the Internet
For the Python libraries, you can install them using the following commands in terminal:
python3 -m pip install flask flask-dance flask-sqlalchemy flask-ngrok
Introduction
Web technologies are a great way to implement a financial system for the front-end. They are open, free, and easy to use. They are also very powerful, and can be used to implement a wide variety of Graphical User Interfaces (GUIs). In this lab, we will implement a simple online brokerage system using Web technologies in Python. We will use the Flask framework to implement the back-end, and the Bootstrap framework with JavaScript to implement the front-end.
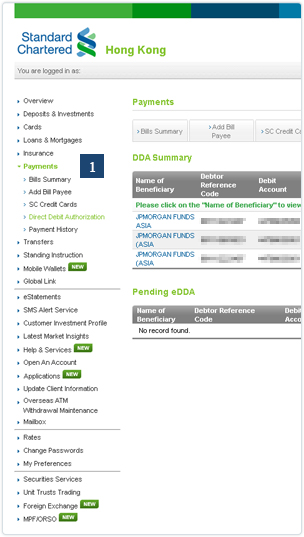
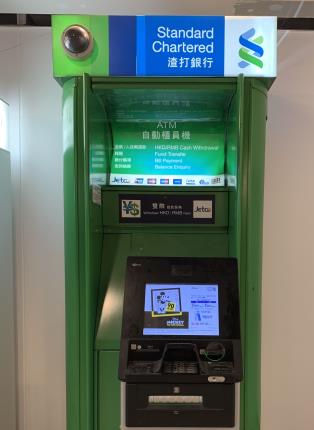
The above image is from the Standard Chartered Hong Kong Online Banking system. Even the ATM machines are connected to the Internet, which also make use of Web technologies to implement the front-end.
Python Web Frameworks
There are many Python Web frameworks available. The most popular ones are Django, Flask, Pyramid, and Tornado. In this lab, we will use Flask, which is a microframework for Python. It is very easy to use, and is very popular. It is also very powerful, and can be used to implement a wide variety of Web applications. Flask is also very lightweight, and is very fast. It is also very extensible, which means that we can add more features to it with various extensions for authentication, database support, etc.
Graphical User Interface (GUI) Frameworks
CSS is the main technology used to implement the front-end of a Web application. It is used to style the HTML elements. There are many CSS frameworks available, such as Bootstrap, Foundation, and Pure. In this lab, we will use Bootstrap, which is the most popular CSS framework. It is very easy to use, and is very powerful. It is also very extensible, and can be used to implement a wide variety of Graphical User Interfaces (GUIs). Bootstrap is also very lightweight, and is very fast. It is also very extensible, which means that we can add more features to it with various extensions for authentication, database support, etc.
There are various CSS frameworks available, such as Bootstrap, Foundation, and Pure. In this lab, we will use Bootstrap, which is the most popular CSS framework. It includes a wide variety of GUI components, such as buttons, forms, tables, and most importantly, the grid system. The grid system is very powerful, and can be used to implement a wide variety layout structures. It’s an easy way to implement a responsive layout, which means that the layout will automatically adjust according to the size of the screen.
HTML, CSS and JavaScript
HTML (HyperText Markup Language)
HTML one of the main technology used to implement the front-end of a Web application. It is used to define the structure of the Web page. The fullname of CSS is Cascading Style Sheets. It is used to style the HTML elements. JavaScript is the main technology used to implement the front-end of a Web application. It is used to add interactivity to the Web page. In this lab, we will use HTML, CSS and JavaScript to implement the front-end of the online brokerage system.
A sample HTML page consists of the following parts:
<!DOCTYPE html>
<html>
<head>
    <title>Page Title</title>
</head>
<body>
    <h1>My First Heading</h1>
    <p>My first paragraph.</p>
</body>
</html>
You may try the code on CodePen.
- The
<!DOCTYPE html>declaration defines this document to be HTML5 - The
<html>element is the root element of an HTML page - The
<head>element contains meta information about the document - The
<title>element specifies a title for the document - The
<body>element contains the visible page content
There are many other HTML elements available, such as <div>, <span>, <table>, <form>, <img>, <a>, etc. We will use these elements to implement the front-end of the online brokerage system. Let’s go through those elements one by one.
<div>is a block-level element, which means that it will start on a new line. It is used to group other elements together. It is also used to define a section in a document.<span>is an inline element, which means that it will not start on a new line. It is used to group other elements together. It is also used to define a section in a document.<table>is used to define an HTML table.<form>is used to define an HTML form for user input.<img>is used to define an image in an HTML page.<a>is used to define a hyperlink, which is used to link from one page to another.
CSS Cascading Style Sheets
To style an HTML element, we need to use CSS. A sample HTML page with CSS consists of the following parts:
<!DOCTYPE html>
<html>
<head>
    <title>Page Title</title>
    <style>
        h1 {
            color: red;
            text-align: center;
        }
        p {
            font-family: verdana;
            font-size: 20px;
        }
        .red {
            color: red;
        }
    </style>
</head>
<body>
    <h1>My <span class="red">First</span> Heading</h1>
    <p>My <span class="red">first</span> paragraph.</p>
</body>
</html>
CSS uses selectors to “find” (or target) HTML elements to apply style. There are many different types of selectors, which we will go through one by one.
h1is a selector that targets all<h1>elementspis a selector that targets all<p>elements.redis a selector that targets all elements with the classred, in above example, it targets the<span>elements with the classred. It would be the same asspan.redandp span.redin such case.
JavaScript
To add interaction to an HTML element, we need to use JavaScript. A sample HTML page with JavaScript consists of the following parts:
<!DOCTYPE html>
<html>
<head>
    <title>Page Title</title>
    <script>
        function myFunction() {
            document.getElementById("demo").innerHTML = "Paragraph changed.";
        }
    </script>
</head>
<body>
    <h1>My First Heading</h1>
    <p id="demo">My first paragraph.</p>
    <button type="button" onclick="myFunction()">Try it</button>
</body>
</html>
Web application development
A minimal server
To create a minimal Flask application, please follow the steps below:
- Create a new folder for the project
- Create a new file named
app.pyin the project folder. - Add the following code to the
app.pyfile:
from flask import Flask
app = Flask(__name__,
            static_url_path='',
            static_folder='static',
			template_folder='static')

@app.route('/hello')
def hello_world():
    return 'Hello, World!'
- Run the application by executing the following command in the terminal:
$ python -m flask --debug run
- Open the browser and go to the URL
http://localhost:5000/hello, you will seeHello, World!in the page.
Flask actually supports rendering HTML pages with template engine. But it’s not needed in a single page web applicantion. Thus we set template_folder as same folder of static_folder which used to serve static resources like images and HTML files. Please create a new folder with name static in the project folder.
Adding an index HTML page with Bootstrap CSS starter template
To make the webpage looks beautifuk, we will use Bootstrap CSS to style up the webpage. The latest version of Bootstrap is 5.2.x, but we will stick with the legacy version 4.6.x.
- Create a new file named
index.htmlin thestaticfolder. - Add the following code to the
index.htmlfile:
<!doctype html>
<html lang="en">
  <head>
    <!-- Required meta tags -->
    <meta charset="utf-8">
    <meta name="viewport" content="width=device-width, initial-scale=1, shrink-to-fit=no">

    <!-- Bootstrap CSS -->
    <link rel="stylesheet" href="https://cdn.jsdelivr.net/npm/bootstrap@4.6.2/dist/css/bootstrap.min.css" integrity="sha384-xOolHFLEh07PJGoPkLv1IbcEPTNtaed2xpHsD9ESMhqIYd0nLMwNLD69Npy4HI+N" crossorigin="anonymous">

    <title>Hello, world!</title>
  </head>
  <body>
    <h1>Hello, world!</h1>

    <!-- Optional JavaScript; choose one of the two! -->

    <!-- Option 1: jQuery and Bootstrap Bundle (includes Popper) -->
    <script src="https://cdn.jsdelivr.net/npm/jquery@3.5.1/dist/jquery.slim.min.js" integrity="sha384-DfXdz2htPH0lsSSs5nCTpuj/zy4C+OGpamoFVy38MVBnE+IbbVYUew+OrCXaRkfj" crossorigin="anonymous"></script>
    <script src="https://cdn.jsdelivr.net/npm/bootstrap@4.6.2/dist/js/bootstrap.bundle.min.js" integrity="sha384-Fy6S3B9q64WdZWQUiU+q4/2Lc9npb8tCaSX9FK7E8HnRr0Jz8D6OP9dO5Vg3Q9ct" crossorigin="anonymous"></script>

    <!-- Option 2: Separate Popper and Bootstrap JS -->
    <!--
    <script src="https://cdn.jsdelivr.net/npm/jquery@3.5.1/dist/jquery.slim.min.js" integrity="sha384-DfXdz2htPH0lsSSs5nCTpuj/zy4C+OGpamoFVy38MVBnE+IbbVYUew+OrCXaRkfj" crossorigin="anonymous"></script>
    <script src="https://cdn.jsdelivr.net/npm/popper.js@1.16.1/dist/umd/popper.min.js" integrity="sha384-9/reFTGAW83EW2RDu2S0VKaIzap3H66lZH81PoYlFhbGU+6BZp6G7niu735Sk7lN" crossorigin="anonymous"></script>
    <script src="https://cdn.jsdelivr.net/npm/bootstrap@4.6.2/dist/js/bootstrap.min.js" integrity="sha384-+sLIOodYLS7CIrQpBjl+C7nPvqq+FbNUBDunl/OZv93DB7Ln/533i8e/mZXLi/P+" crossorigin="anonymous"></script>
    -->
  </body>
</html>
- Please an index route handler function as follows in
app.py
@app.route('/)
def index():
	return render_template('index.html');
- Restart Flask server by pressing
Ctrl-Cand runpython3 -m flask --debug runagain - Go to
http://localhost:5000/and see the result.
Generating Bootstrap CSS and HTML code with Layout It! Bootstrap builder
The reason for sticking with legacy Bootstrap version 4.6.x is that the Bootstrap builder only supports Bootstrap version 4.6.x. Layout it! Builder allow user to drag and drop Bootstrap components to generate HTML code. The generated HTML code can be copy and paste to the index.html file.
- Go to Layout It! Bootstrap builder
- Drag and drop Bootstrap components to generate HTML code
- Copy and paste the generated HTML code to the
index.htmlfile - Restart Flask server by pressing
Ctrl-Cand runpython3 -m flask --debug runagain - Go to
http://localhost:5000/and see the result.
Here is the sample code generated by Layout It! Bootstrap builder for our lab:
<div class="container-fluid">
	<div class="row">
		<div class="col-md-12">
			<nav class="navbar navbar-expand-lg navbar-light bg-light">

				<button class="navbar-toggler" type="button" data-toggle="collapse" data-target="#bs-example-navbar-collapse-1">
					<span class="navbar-toggler-icon"></span>
				</button> <a class="navbar-brand" href="#">Brand</a>
				<div class="collapse navbar-collapse" id="bs-example-navbar-collapse-1">
					<ul class="navbar-nav">
						<li class="nav-item active">
							 <a class="nav-link" href="#">Link <span class="sr-only">(current)</span></a>
						</li>
						<li class="nav-item">
							 <a class="nav-link" href="#">Link</a>
						</li>
						<li class="nav-item dropdown">
							 <a class="nav-link dropdown-toggle" href="http://example.com" id="navbarDropdownMenuLink" data-toggle="dropdown">Dropdown link</a>
							<div class="dropdown-menu" aria-labelledby="navbarDropdownMenuLink">
								 <a class="dropdown-item" href="#">Action</a> <a class="dropdown-item" href="#">Another action</a> <a class="dropdown-item" href="#">Something else here</a>
								<div class="dropdown-divider">
								</div> <a class="dropdown-item" href="#">Separated link</a>
							</div>
						</li>
					</ul>
					<form class="form-inline">
						<input class="form-control mr-sm-2" type="text" />
						<button class="btn btn-primary my-2 my-sm-0" type="submit">
							Search
						</button>
					</form>
					<ul class="navbar-nav ml-md-auto">
						<li class="nav-item active">
							 <a class="nav-link" href="#">Link <span class="sr-only">(current)</span></a>
						</li>
						<li class="nav-item dropdown">
							 <a class="nav-link dropdown-toggle" href="http://example.com" id="navbarDropdownMenuLink" data-toggle="dropdown">Dropdown link</a>
							<div class="dropdown-menu dropdown-menu-right" aria-labelledby="navbarDropdownMenuLink">
								 <a class="dropdown-item" href="#">Action</a> <a class="dropdown-item" href="#">Another action</a> <a class="dropdown-item" href="#">Something else here</a>
								<div class="dropdown-divider">
								</div> <a class="dropdown-item" href="#">Separated link</a>
							</div>
						</li>
					</ul>
				</div>
			</nav>
			<div class="carousel slide" id="carousel-939462">
				<ol class="carousel-indicators">
					<li data-slide-to="0" data-target="#carousel-939462" class="active">
					</li>
					<li data-slide-to="1" data-target="#carousel-939462">
					</li>
					<li data-slide-to="2" data-target="#carousel-939462">
					</li>
				</ol>
				<div class="carousel-inner">
					<div class="carousel-item active">
						<img class="d-block w-100" alt="Carousel Bootstrap First" src="https://www.layoutit.com/img/sports-q-c-1600-500-1.jpg" />
						<div class="carousel-caption">
							<h4>
								First Thumbnail label
							</h4>
							<p>
								Cras justo odio, dapibus ac facilisis in, egestas eget quam. Donec id elit non mi porta gravida at eget metus. Nullam id dolor id nibh ultricies vehicula ut id elit.
							</p>
						</div>
					</div>
					<div class="carousel-item">
						<img class="d-block w-100" alt="Carousel Bootstrap Second" src="https://www.layoutit.com/img/sports-q-c-1600-500-2.jpg" />
						<div class="carousel-caption">
							<h4>
								Second Thumbnail label
							</h4>
							<p>
								Cras justo odio, dapibus ac facilisis in, egestas eget quam. Donec id elit non mi porta gravida at eget metus. Nullam id dolor id nibh ultricies vehicula ut id elit.
							</p>
						</div>
					</div>
					<div class="carousel-item">
						<img class="d-block w-100" alt="Carousel Bootstrap Third" src="https://www.layoutit.com/img/sports-q-c-1600-500-3.jpg" />
						<div class="carousel-caption">
							<h4>
								Third Thumbnail label
							</h4>
							<p>
								Cras justo odio, dapibus ac facilisis in, egestas eget quam. Donec id elit non mi porta gravida at eget metus. Nullam id dolor id nibh ultricies vehicula ut id elit.
							</p>
						</div>
					</div>
				</div> <a class="carousel-control-prev" href="#carousel-939462" data-slide="prev"><span class="carousel-control-prev-icon"></span> <span class="sr-only">Previous</span></a> <a class="carousel-control-next" href="#carousel-939462" data-slide="next"><span class="carousel-control-next-icon"></span> <span class="sr-only">Next</span></a>
			</div>
			<div class="jumbotron">
				<h2>
					Hello, world!
				</h2>
				<p>
					This is a template for a simple marketing or informational website. It includes a large callout called the hero unit and three supporting pieces of content. Use it as a starting point to create something more unique.
				</p>
				<p>
					<a class="btn btn-primary btn-large" href="#">Learn more</a>
				</p>
			</div>
			<div class="row">
				<div class="col-md-9">
					<div class="row" id="leftrow">
						<div class="col-md-4">
							<div class="card">
								<h5 class="card-header">
									Card title
								</h5>
								<div class="card-body">
									<p class="card-text">
										Card content
									</p>
								</div>
								<div class="card-footer">
									Card footer
								</div>
							</div>
						</div>
					</div>
				</div>
				<div class="col-md-3">
					<form role="form">
						<div class="form-group">

							<label for="exampleInputEmail1">
								Email address
							</label>
							<input type="email" class="form-control" id="exampleInputEmail1" />
						</div>
						<div class="form-group">

							<label for="exampleInputPassword1">
								Password
							</label>
							<input type="password" class="form-control" id="exampleInputPassword1" />
						</div>
						<div class="form-group">

							<label for="exampleInputFile">
								File input
							</label>
							<input type="file" class="form-control-file" id="exampleInputFile" />
							<p class="help-block">
								Example block-level help text here.
							</p>
						</div>
						<div class="checkbox">

							<label>
								<input type="checkbox" /> Check me out
							</label>
						</div>
						<button type="submit" class="btn btn-primary">
							Submit
						</button>
					</form>
				</div>
			</div>
		</div>
	</div>
</div>
Please replace the line <h1>Hello, world!</h1> with above block of code in index.html and check out the result in browser by restart Flask.
Making the web applicantion accessible publicly with ngrok
ngrok is a tool that allows you to expose a web server running on your local machine to the internet. It creates a secure tunnel from a public endpoint to a locally running web service. You can use it to test webhooks and other integrations without needing a publicly accessible web server.
Making Flask app public with pyngrok
Please modify app.py as follows, we add ngrok’s code under the line app = Flask(__name__ to generate a public URL before app initialization. After it got the public URL, we set it as BASE_URL for the app.
app = Flask(__name__,
			static_url_path='',
            static_folder='static',
            template_folder='static')

import os
import sys
from pyngrok import ngrok

# Get the dev server port (defaults to 5000 for Flask, can be overridden with `--port`
# when starting the server
port = sys.argv[sys.argv.index("--port") + 1] if "--port" in sys.argv else 5000

# Open a ngrok tunnel to the dev server
public_url = ngrok.connect(port).public_url
print(" * ngrok tunnel \"{}\" -> \"http://127.0.0.1:{}\"".format(public_url, port))
app.config["BASE_URL"] = public_url

#...
After that, please restart Flask and you will see the public URL for our web application in console output. The URL will be different for each time you restart Flask.
Here is a sample output:
* ngrok tunnel "http://a1b2c3d4.ngrok.io" -> "http://127.0.0.1:5000"
The http URL actually supports https, which make it more secure. You may try it out by replacing http with https.
Finnhub: Getting financial data with simple API
Finnhub is a free API for real-time and historical financial data. It provides stock market data, forex, crypto, economic data, company fundamentals and much more. It is a great tool for developers to build financial applications.
Registering an account
Please go to Finnhub and register an account. You will get a free API key after registration.
Getting data in JSON format
Finnhub provides an API for getting latest Market News. Let’s try it out.
The response is in JSON format. JSON stand for JavaScript Object Notation, which is a lightweight data-interchange format. It is easy for humans to read and write. It is easy for machines to parse and generate. JSON is a text format that is completely language independent but uses conventions that are familiar to programmers of the C-family of languages, including C, C++, C#, Java, JavaScript, Perl, Python, and many others. These properties make JSON an ideal data-interchange language.
Getting the latest Market News
Please go to Market News and click on the links in Examples, you will see the sample response like this:
[{
    "category": "technology",
    "datetime": 1596589501,
    "headline": "Square surges after reporting 64% jump in revenue, more customers using Cash App",
    "id": 5085164,
    "image": "https://image.cnbcfm.com/api/v1/image/105569283-1542050972462rts25mct.jpg?v=1542051069",
    "related": "",
    "source": "CNBC",
    "summary": "Shares of Square soared on Tuesday evening after posting better-than-expected quarterly results and strong growth in its consumer payments app.",
    "url": "https://www.cnbc.com/2020/08/04/square-sq-earnings-q2-2020.html"
  },
  {
    "category": "business",
    "datetime": 1596588232,
    "headline": "B&G Foods CEO expects pantry demand to hold up post-pandemic",
    "id": 5085113,
    "image": "https://image.cnbcfm.com/api/v1/image/106629991-1595532157669-gettyimages-1221952946-362857076_1-5.jpeg?v=1595532242",
    "related": "",
    "source": "CNBC",
    "summary": "\"I think post-Covid, people will be working more at home, which means people will be eating more breakfast\" and other meals at home, B&G CEO Ken Romanzi said.",
    "url": "https://www.cnbc.com/2020/08/04/bg-foods-ceo-expects-pantry-demand-to-hold-up-post-pandemic.html"
  },
  {
    "category": "top news",
    "datetime": 1596584406,
    "headline": "Anthony Levandowski gets 18 months in prison for stealing Google self-driving car files",
    "id": 5084850,
    "image": "https://image.cnbcfm.com/api/v1/image/106648265-1596584130509-UBER-LEVANDOWSKI.JPG?v=1596584247",
    "related": "",
    "source": "CNBC",
    "summary": "A U.S. judge on Tuesday sentenced former Google engineer Anthony Levandowski to 18 months in prison for stealing a trade secret from Google related to self-driving cars months before becoming the head of Uber Technologies Inc's rival unit.",
    "url": "https://www.cnbc.com/2020/08/04/anthony-levandowski-gets-18-months-in-prison-for-stealing-google-self-driving-car-files.html"
}]
Getting Stock Quote
Please go to Stock Quote and click on the links in Examples, you will see the sample response like this:
{
  "c": 261.74,
  "h": 263.31,
  "l": 260.68,
  "o": 261.07,
  "pc": 259.45,
  "t": 1582641000
}
Getting Stock Candles
Please go to Stock Candles and click on the links in Examples, you will see the sample response like this:
{
  "c": [
    0,
    0,
    0
  ],
  "h": [
    0,
    0,
    0
  ],
  "l": [
    0,
    0,
    0
  ],
  "o": [
    0,
    0,
    0
  ],
  "s": "ok",
  "t": [
    0,
    0,
    0
  ],
  "v": [
    0,
    0,
    0
  ]
}
Getting Company Profile
Please go to Company Profile and click on the links in Examples, you will see the sample response like this:
{
  "country": "US",
  "currency": "USD",
  "exchange": "NASDAQ/NMS (GLOBAL MARKET)",
  "ipo": "1980-12-12",
  "marketCapitalization": 1415993,
  "name": "Apple Inc",
  "phone": "14089961010",
  "shareOutstanding": 4375.47998046875,
  "ticker": "AAPL",
  "weburl": "https://www.apple.com/",
  "logo": "https://static.finnhub.io/logo/87cb30d8-80df-11ea-8951-00000000092a.png",
  "finnhubIndustry":"Technology"
}
Rendering API data in HTML with JavaScript
Because of the response data is in JSON format, we could fetch the data and render it in HTML with JavaScript directly in the webpage. In Javascript, we could use fetch() to get the data from the API. Please go to Fetch API for more details.
Please put the following code right before </body>, which is the ending tag of <body> element.
<script>
async function fetchNews() {
    let response = await fetch(`https://finnhub.io/api/v1/news?category=general&token=YOUR_API_KEY`);
    if (response.ok) {
        let rawdata = await response.json();
		document.getElementById('leftrow').innerHTML = rawdata.map(data => `
<div class="col-md-4">
  <div class="card">
    <img src="${data.image}" class="card-img-top" alt="${data.headline}">
    <div class="card-body">
      <h5 class="card-title">${data.headline}</h5>
      <p class="card-text">${data.summary}</p>
      <a href="${data.url}" target="_blank" class="btn btn-primary">Source</a>
    </div>
  </div>
</div>
`).join('');
    }
}
fetchNews();
</script>
In order to let user refresh nNews, we could change the first Link in navigation bar to News and provide refresh functionility. Let’s modify the first Link with follows.
From:
<a class="nav-link" href="#">Link <span class="sr-only">(current)</span></a>
to:
<a class="nav-link" href="#" onclick="fetchNews()">Latest News <span class="sr-only">(current)</span></a>
Implementing multi-user login with OAuth
OAuth is a popular way to implement multi-user login. It is a protocol that allows a user to grant limited access to their information on one website, to another website, without having to expose their password. OAuth is used by many websites, including Google, Facebook, Twitter, and GitHub.
What is OAuth?
OAuth is an open standard for access delegation, commonly used as a way for Internet users to grant websites or applications access to their information on other websites but without giving them the passwords. This mechanism is used by companies such as Google, Facebook, Microsoft and Twitter to permit the users to share information about their accounts with third party applications or websites.
OAuth 2.0
OAuth 2.0 is the industry-standard protocol for authorization. OAuth 2.0 supersedes the work done on the original OAuth protocol created in 2006. OAuth 2.0 focuses on client developer simplicity while providing specific authorization flows for web applications, desktop applications, mobile phones, and living room devices. This specification and its extensions are being developed within the IETF OAuth Working Group.
Connecting to OAuth providers with Flask-Dance
Flask-Dance is a Flask extension that makes it easy to add OAuth authentication to Flask application. It supports OAuth 1.0a and OAuth 2.0, and it supports multiple providers, including Google, Facebook, GitHub, and Twitter.
Installing Flask-Dance
To install Flask-Dance, run the following command in your terminal:
pip install flask-dance
Generate client_id and client_secret for OAuth
- Go to Google API Console and click
Create Projectbutton. - Enter a project name and click
Createbutton. - Click
Credentialson the left side. - Click
Create Credentialsbutton and selectOAuth client ID. - Select
Web applicationand enter a name. - Enter
https://your_ngrok_url.ngrok.io/login/google/authorizedinAuthorized redirect URIsand clickCreatebutton. - Copy the
client_idandclient_secretand save it for later use.
- Go to Facebook for Developers and click
My Appson the top right corner. - Click
Add a New Appbutton. - Enter a display name and click
Create App IDbutton. - Click
Dashboardon the left side. - Click
Add Productbutton and selectFacebook Login. - Click
Settingson the left side. - Enter
https://your_ngrok_url.ngrok.io/login/facebook/authorizedinValid OAuth Redirect URIsand clickSave Changesbutton. - Click
Basicon the left side. - Copy the
App IDandApp Secretand save it for later use.
GitHub
- Go to GitHub Developer Settings on GitHub
- Click
New OAuth Appbutton. - Enter a name and enter
https://your_ngrok_url.ngrok.io/login/github/authorizedinHomepage URLandAuthorization callback URLand clickRegister applicationbutton. - Copy the
Client IDandClient Secretand save it for later use.
- Go to Twitter Developer Portal and click
Create an appbutton. - Enter a name and enter
https://your_ngrok_url.ngrok.io/login/twitter/authorizedinWebsite URLandCallback URLsand clickCreatebutton. - Copy the
API keyandAPI secret
Configuring OAuth Client ID and Client Secret in app.py
Please add the following code right after app = Flask(__name__) in app.py.
from flask_dance.contrib.google import make_google_blueprint, google
import os
os.environ['OAUTHLIB_INSECURE_TRANSPORT'] = '1'
app.secret_key = "supersekrit"
blueprint = make_google_blueprint(
    client_id="your-client-id-here",
    client_secret="your-client-secret-here",
)
app.register_blueprint(blueprint, url_prefix="/login")
Then modify the index route as follows. We add the checking for user login with Google, if the user is not logged in, we will redirect the user to Google login page.
@app.route('/')
def index():
    if not google.authorized:
        return redirect(url_for("google.login"))
    return render_template('index.html')
aFter we could test it out with the ngrok URL.
Visualizing data with amChart
amChart is a JavaScript charting library that allows you to create beautiful charts and maps with ease. It is a commercial product, but it provides a free version for non-commercial use. It is a powerful and flexible charting library that can be used to create a wide variety of charts and maps. It is a great tool for creating interactive charts and maps for your website or application.
Configuring amChart in index.html
Please add the following code right before </head> in static/index.html.
<!-- Styles -->
<style>
#chartdiv {
  width: 100%;
  height: 500px;
max-width: 100%
}
</style>

<!-- Resources -->
<script src="https://cdn.amcharts.com/lib/5/index.js"></script>
<script src="https://cdn.amcharts.com/lib/5/xy.js"></script>
<script src="https://cdn.amcharts.com/lib/5/themes/Animated.js"></script>
Modifying the form for sending stock symbol
In the template we generated from Layout it! Builder, there is a search box on the navigation bar. Let’s reuse it as the stock symbol input. Please modify it as follows.
<form class="form-inline" onsubmit="fetchStock(this); return false">
	<input class="form-control mr-sm-2" name="symbol" type="text" id="symbol" />
	<button class="btn btn-primary my-2 my-sm-0" type="submit">
		Search
	</button>
</form>
Then we will need to provide implementation for fetchStock() function. Let’s put the following code right before </body> in static/index.html.
<script>
async function fetchStock(form) {
    let symbol = document.getElementById("symbol").value;
    let url = `https://finnhub.io/api/v1/stock/candle?symbol=${symbol}&resolution=D&from=${parseInt(Date.now() / 1000 - 3600 * 24 * 365)}&to=${parseInt(Date.now() / 1000)}&token=YOUR_API_KEY`;
    let response = await fetch(url);
    if (response.ok) {
        let rawdata = await response.json();
        // transform the data from Finnhub to amCharts
		let data = rawdata.v.map(function(value, index) {
		    return {
		        date: new Date(rawdata.t[index]*1000).getTime(),
		        value: (rawdata.h[index] + rawdata.l[index]) / 2,
		        open: rawdata.o[index],
		        low: rawdata.l[index],
		        high: rawdata.h[index],
		        close: rawdata.c[index]
		    }
		})
		document.getElementById('leftrow').innerHTML = '<div id="chartdiv"></div>';
		// initialize amCharts5
		am5.ready(function () {

		    // Create root element
		    // https://www.amcharts.com/docs/v5/getting-started/#Root_element
		    var root = am5.Root.new("chartdiv");

		    // Set themes
		    // https://www.amcharts.com/docs/v5/concepts/themes/
		    root.setThemes([am5themes_Animated.new(root)]);

		    // Create chart
		    // https://www.amcharts.com/docs/v5/charts/xy-chart/
		    var chart = root.container.children.push(
		        am5xy.XYChart.new(root, {
		            focusable: true,
		            panX: true,
		            panY: true,
		            wheelX: "panX",
		            wheelY: "zoomX"
		        })
		    );

		    // Create axes
		    // https://www.amcharts.com/docs/v5/charts/xy-chart/axes/
		    var xAxis = chart.xAxes.push(
		        am5xy.DateAxis.new(root, {
		            groupData: true,
		            maxDeviation: 0.5,
		            baseInterval: { timeUnit: "day", count: 1 },
		            renderer: am5xy.AxisRendererX.new(root, { pan: "zoom" }),
		            tooltip: am5.Tooltip.new(root, {})
		        })
		    );

		    var yAxis = chart.yAxes.push(
		        am5xy.ValueAxis.new(root, {
		            maxDeviation: 1,
		            renderer: am5xy.AxisRendererY.new(root, { pan: "zoom" })
		        })
		    );

		    var color = root.interfaceColors.get("background");

		    // Add series
		    // https://www.amcharts.com/docs/v5/charts/xy-chart/series/
		    var series = chart.series.push(
		        am5xy.CandlestickSeries.new(root, {
		            fill: color,
		            calculateAggregates: true,
		            stroke: color,
		            name: symbol,
		            xAxis: xAxis,
		            yAxis: yAxis,
		            valueYField: "value",
		            openValueYField: "open",
		            lowValueYField: "low",
		            highValueYField: "high",
		            valueXField: "date",
		            lowValueYGrouped: "low",
		            highValueYGrouped: "high",
		            openValueYGrouped: "open",
		            valueYGrouped: "close",
		            legendValueText:
		                "open: {openValueY} low: {lowValueY} high: {highValueY} close: {valueY}",
		            legendRangeValueText: "{valueYClose}",
		            tooltip: am5.Tooltip.new(root, {
		                pointerOrientation: "horizontal",
		                labelText: "open: {openValueY}\nlow: {lowValueY}\nhigh: {highValueY}\nclose: {valueY}"
		            })
		        })
		    );

		    // Add cursor
		    // https://www.amcharts.com/docs/v5/charts/xy-chart/cursor/
		    var cursor = chart.set(
		        "cursor",
		        am5xy.XYCursor.new(root, {
		            xAxis: xAxis
		        })
		    );
		    cursor.lineY.set("visible", false);

		    // Stack axes vertically
		    // https://www.amcharts.com/docs/v5/charts/xy-chart/axes/#Stacked_axes
		    chart.leftAxesContainer.set("layout", root.verticalLayout);

		    // Add scrollbar
		    // https://www.amcharts.com/docs/v5/charts/xy-chart/scrollbars/
		    var scrollbar = am5xy.XYChartScrollbar.new(root, {
		        orientation: "horizontal",
		        height: 50
		    });
		    chart.set("scrollbarX", scrollbar);

		    var sbxAxis = scrollbar.chart.xAxes.push(
		        am5xy.DateAxis.new(root, {
		            groupData: true,
		            groupIntervals: [{ timeUnit: "week", count: 1 }],
		            baseInterval: { timeUnit: "day", count: 1 },
		            renderer: am5xy.AxisRendererX.new(root, {
		                opposite: false,
		                strokeOpacity: 0
		            })
		        })
		    );

		    var sbyAxis = scrollbar.chart.yAxes.push(
		        am5xy.ValueAxis.new(root, {
		            renderer: am5xy.AxisRendererY.new(root, {})
		        })
		    );

		    var sbseries = scrollbar.chart.series.push(
		        am5xy.LineSeries.new(root, {
		            xAxis: sbxAxis,
		            yAxis: sbyAxis,
		            valueYField: "value",
		            valueXField: "date"
		        })
		    );

		    // Add legend
		    // https://www.amcharts.com/docs/v5/charts/xy-chart/legend-xy-series/
		    var legend = yAxis.axisHeader.children.push(am5.Legend.new(root, {}));

		    legend.data.push(series);

		    legend.markers.template.setAll({
		        width: 10
		    });

		    legend.markerRectangles.template.setAll({
		        cornerRadiusTR: 0,
		        cornerRadiusBR: 0,
		        cornerRadiusTL: 0,
		        cornerRadiusBL: 0
		    });

		    // set data
		    series.data.setAll(data);
		    sbseries.data.setAll(data);

		    // Make stuff animate on load
		    // https://www.amcharts.com/docs/v5/concepts/animations/
		    series.appear(1000);
		    chart.appear(1000, 100);
		});
    }
}
</script>
After input a correct stock symbol and click on Search, a Candle-stick chart will be displayed in the area on Market News. News would not shown when chart is displayed.
Accessing database with Flask-SQLAlchemy
Flask-SQLAlchemy is an extension for Flask that adds support for SQLAlchemy to your application. SQLAlchemy is the Python SQL toolkit and Object Relational Mapper that gives application developers the full power and flexibility of SQL. SQLAlchemy provides a full suite of well known enterprise-level persistence patterns, designed for efficient and high-performing database access, adapted into a simple and Pythonic domain language.
Database
The database used in this project is SQLite. SQLite is a C-language library that implements a small, fast, self-contained, high-reliability, full-featured, SQL database engine. SQLite is the most used database in the world. It is built into all mobile phones and most computers and comes bundled inside countless other applications that people use every day.
Configuration
In order to use Flask-SQLAlchemy, we need to configure the database URI. The database URI is a string that contains the information needed to connect to a database. The URI is in the following format:
dialect://username:password@host:port/database
The dialect is the name of the database engine. The driver is the name of the database driver. The username, password, host, and port are the credentials used to connect to the database. The database is the name of the database.
SQLAlchemy supports wide range of database systems. The following is a list of the most common database systems and example URI:
# SQLite, relative to Flask instance path
sqlite:///project.db
# PostgreSQL
postgresql://scott:tiger@localhost/project
# MySQL / MariaDB
mysql://scott:tiger@localhost/project
In this project, the database URI is configured in app.py. Please add the following code after the line of app initialization.
from flask_sqlalchemy import SQLAlchemy
db = SQLAlchemy()
app = Flask(__name__,
            static_url_path='',
            static_folder='static',
            template_folder='static')
app.config['SQLALCHEMY_DATABASE_URI'] = 'sqlite:///test.db'
db.init_app(app)
Define Data Model
Before saving data to database, a scheme for the data is needed. In SQLAlchemy, a scheme is defined by a class that inherits from db.Model. The class attributes are the columns of the table. The type of each column is defined by a Field object. The following are example of simple data models. Please put it at the end of app.py
class User(db.Model):
    id = db.Column(db.Integer, primary_key=True)
    username = db.Column(db.String(255), unique=True, nullable=False)
    email = db.Column(db.String(255), unique=True, nullable=False)

    def __repr__(self):
        return '<User %r>' % self.username

class UserNews(db.Model):
    id = db.Column(db.Integer, primary_key=True)
    username = db.Column(db.String(255), unique=False, nullable=False)
    source = db.Column(db.String(1024), unique=False, nullable=False)

    def __repr__(self):
        return '<UserNews %r>' % self.username + ' ' + self.source

class UserStock(db.Model):
    id = db.Column(db.Integer, primary_key=True)
    username = db.Column(db.String(255), unique=False, nullable=False)
    symbol = db.Column(db.String(50), unique=False, nullable=False)

    def __repr__(self):
        return '<UserStock %r>' % self.username + ' ' + self.symbol

with app.app_context():
	db.create_all()
Create Database
After defining the data model, we need to create the database in app.py. Please add the following code after the line of db initialization.
db.create_all()
Drop Database
To delete all data, we may simply drop all tables in the database.
db.drop_all()
Insert data into database
Saving Stock
First we construct a route handler function in app.py to handle data submitted from front-end.
@app.route("/stock", methods = ['POST'])
def saveStock():
    if google.authorized:
        google_user = google.get("/oauth2/v2/userinfo")
        symbol = request.form['symbol']
        db.session.add(UserStock(username=google_user['name'], symbol=symbol)))
        db.session.commit()
        return 'ok'
    return redirect(url_for("google.login"))
Then we would modify the fetchStock() function in front-end to add a fetch call to the back-end route that we created.
let send = await fetch('/stock', {
	method:'POST',
	headers: {
		'Content-Type': 'application/x-www-form-urlencoded'
    },
	body: 'symbol='+symbol
});
if (send.ok) {
	console.log('stock symbol saved.');
}
Querying data
stocks = UserStock.query.filter_by(username=google_user['login'])
Deleting data
@app.route("/stock/<symbol>", methods=['DELETE'])
def deleteStock(symbol):
    if not google.authorized:
        redirect(url_for("google.login"))

    google_user = google.get("/oauth2/v2/userinfo")
    stocks = UserStock.query.filter_by(username=google_user['name'], symbol=symbol)
    for s in stocks:
        db.session.delete(s)
    db.session.commit()
    return 'ok'